Connect Your WordPress Roadmap to External Dev Tools via REST API


When Your Roadmap Needs External Connections
A product roadmap inside WordPress is powerful on its own. It gives your team and stakeholders a shared view of what is planned, in progress, and complete. But the moment your development workflow involves tools outside WordPress, you hit a wall.
Your developers track bugs in GitHub Issues. Your CI/CD pipeline runs in GitHub Actions or GitLab CI. Your project manager lives in Slack. Your client wants to see progress on the roadmap board. These systems do not talk to each other by default, and manually keeping them in sync is a recipe for stale data and missed updates.
The Product Roadmap plugin (Pro) includes a REST API that opens up programmatic access to your roadmap data. With it, you can read, create, update, and delete roadmap items from any system that can make HTTP requests. GitHub Actions can push status updates. Custom dashboards can pull live data. CI/CD pipelines can create items when builds fail. The roadmap becomes the central hub, and the API is the glue that connects everything.
This post is a technical walkthrough for developers who want to integrate their WordPress roadmap with external development tools. We will cover the API endpoints, authentication, practical integration patterns, and real-world automation workflows.
Understanding the Pro REST API Endpoints
The Product Roadmap Pro REST API follows WordPress REST API conventions. If you have worked with the WP REST API for posts, pages, or custom post types, the patterns will be immediately familiar.
Base URL Structure
All endpoints live under your WordPress site’s REST API namespace. The base URL follows the standard pattern:
https://yoursite.com/wp-json/product-roadmap/v1/From this base, the API exposes endpoints for items, statuses, categories, boards, and votes. Each endpoint supports standard HTTP methods: GET for reading, POST for creating, PUT/PATCH for updating, and DELETE for removing.
Core Endpoints
Here are the primary endpoints you will work with:
GET /items, List all roadmap items, with support for filtering by status, category, and boardGET /items/{id}, Retrieve a single roadmap item with all its metadataPOST /items, Create a new roadmap itemPUT /items/{id}, Update an existing roadmap itemDELETE /items/{id}, Delete a roadmap itemGET /statuses, List all available statusesGET /boards, List all boards (Pro)POST /items/{id}/vote, Cast a vote on an item
Response Format
All responses are standard JSON. A typical item response includes the item ID, title, description, status, category, board assignment, vote count, target date, and timestamps for creation and last modification. Pagination follows the WordPress convention of using X-WP-Total and X-WP-TotalPages headers.

Authentication: Securing API Access
The REST API requires authentication for any write operation (creating, updating, deleting items). Read operations on public roadmap items may be accessible without authentication, depending on your board’s visibility settings.
Application Passwords (Recommended)
WordPress 5.6 introduced application passwords, and this is the recommended authentication method for server-to-server integrations. To set one up:
- Go to Users → Your Profile in the WordPress admin
- Scroll to the “Application Passwords” section
- Enter a name (e.g., “GitHub Integration”) and click “Add New Application Password”
- Copy the generated password immediately, it will not be shown again
Use the application password with HTTP Basic Authentication. In your API requests, set the Authorization header:
Authorization: Basic base64encode(username:application_password)Here is a practical example using cURL:
curl -X GET \
  https://yoursite.com/wp-json/product-roadmap/v1/items \
  -H "Authorization: Basic dXNlcm5hbWU6eHh4eCB4eHh4IHh4eHggeHh4eCB4eHh4IHh4eHg="
Cookie Authentication (For Frontend Scripts)
If you are making API calls from JavaScript running on your WordPress site, cookie authentication works seamlessly. The logged-in user’s session cookie authenticates the request. You will also need to include a nonce:
fetch('/wp-json/product-roadmap/v1/items', {
  headers: {
    'X-WP-Nonce': wpApiSettings.nonce
  }
})
This method is ideal for custom dashboard widgets or frontend interfaces that extend the roadmap’s built-in views.
OAuth 2.0 (For Third-Party Applications)
For more complex integrations where you need delegated access, the WordPress REST API supports OAuth 2.0 through plugins like the OAuth Server plugin. This is appropriate when building standalone applications that need to access roadmap data on behalf of specific users.
Fetching Items Programmatically
Reading roadmap data is the foundation of any integration. Whether you are building a dashboard, generating reports, or syncing data to another system, it starts with fetching items.
Basic Item Retrieval
Fetch all items with a simple GET request:
GET /wp-json/product-roadmap/v1/itemsThe response is a JSON array of item objects. Each object includes all item properties. Pagination defaults to 10 items per page, adjustable with the per_page parameter (maximum 100).
Filtering by Status
To fetch only items in a specific status, use the status filter parameter:
GET /wp-json/product-roadmap/v1/items?status=in-progressThis is particularly useful for dashboards that focus on active work or for scripts that need to process items in a specific stage of your workflow.
Filtering by Board
When working with multiple boards in the Pro version, filter by board ID to retrieve items for a specific project:
GET /wp-json/product-roadmap/v1/items?board=42Combining Filters
Filters are composable. Fetch all “In Progress” items on a specific board, sorted by vote count:
GET /wp-json/product-roadmap/v1/items?board=42&status=in-progress&orderby=votes&order=descPython Example: Fetching Active Items
Here is a complete Python script for fetching all active roadmap items:
import requests
from requests.auth import HTTPBasicAuth

SITE_URL = "https://yoursite.com"
USERNAME = "api-user"
APP_PASSWORD = "xxxx xxxx xxxx xxxx xxxx xxxx"

def get_active_items(board_id=None):
    url = f"{SITE_URL}/wp-json/product-roadmap/v1/items"
    params = {
        "status": "in-progress",
        "per_page": 100
    }
    if board_id:
        params["board"] = board_id

    response = requests.get(
        url,
        params=params,
        auth=HTTPBasicAuth(USERNAME, APP_PASSWORD)
    )
    response.raise_for_status()
    return response.json()

items = get_active_items(board_id=42)
for item in items:
    print(f"[{item['status']}] {item['title']} - {item['votes']} votes")
Creating and Updating Items via the API
Write operations are where the API becomes truly powerful. Instead of manually creating roadmap items in the WordPress admin, you can automate item creation from external triggers.
Creating a New Item
Send a POST request with the item data in the request body:
POST /wp-json/product-roadmap/v1/items
Content-Type: application/json

{
  "title": "Add dark mode support",
  "description": "Users have requested a dark mode option for the admin interface.",
  "status": "planned",
  "category": "feature-request",
  "board": 42,
  "target_date": "2026-06-15"
}
The API returns the created item with its assigned ID, which you can store for future updates.
Updating an Existing Item
To move an item to a new status or update its details, send a PUT request:
PUT /wp-json/product-roadmap/v1/items/157
Content-Type: application/json

{
  "status": "in-progress",
  "description": "Development started. Targeting completion by end of sprint 12."
}
Only include the fields you want to change. Unspecified fields retain their current values.
Batch Operations
For scenarios where you need to update multiple items at once, the WordPress REST API supports batch requests. Send an array of operations in a single HTTP call to reduce latency and avoid hitting rate limits:
POST /wp-json/batch/v1
Content-Type: application/json

{
  "requests": [
    {
      "method": "PUT",
      "path": "/product-roadmap/v1/items/157",
      "body": { "status": "completed" }
    },
    {
      "method": "PUT",
      "path": "/product-roadmap/v1/items/158",
      "body": { "status": "in-progress" }
    }
  ]
}
Syncing with GitHub Issues
One of the most requested integration patterns is syncing roadmap items with GitHub Issues. Here is how to build a bidirectional sync.
GitHub to Roadmap: Creating Items from Issues
Set up a GitHub Action that triggers when a new issue is opened with a specific label (e.g., “roadmap”). The action reads the issue details and creates a corresponding roadmap item via the API.
name: Sync Issue to Roadmap
on:
  issues:
    types: [opened, labeled]

jobs:
  sync:
    runs-on: ubuntu-latest
    if: contains(github.event.issue.labels.*.name, 'roadmap')
    steps:
      - name: Create Roadmap Item
        run: |
          curl -X POST \
            "${{ secrets.WP_SITE_URL }}/wp-json/product-roadmap/v1/items" \
            -H "Authorization: Basic ${{ secrets.WP_API_TOKEN }}" \
            -H "Content-Type: application/json" \
            -d '{
              "title": "${{ github.event.issue.title }}",
              "description": "GitHub Issue #${{ github.event.issue.number }}: ${{ github.event.issue.body }}",
              "status": "planned",
              "board": 42
            }'
Roadmap to GitHub: Updating Issues from Status Changes
For the reverse direction, use a WordPress hook that fires when a roadmap item’s status changes. The hook makes an API call to GitHub to update the corresponding issue’s labels or state:
add_action('product_roadmap_status_changed', function($item_id, $new_status, $old_status) {
    $item = get_post($item_id);
    $github_issue = get_post_meta($item_id, '_github_issue_number', true);

    if (!$github_issue) return;

    $github_token = defined('GITHUB_TOKEN') ? GITHUB_TOKEN : '';
    $repo = 'your-org/your-repo';

    if ($new_status === 'completed') {
        wp_remote_request(
            "https://api.github.com/repos/{$repo}/issues/{$github_issue}",
            [
                'method' => 'PATCH',
                'headers' => [
                    'Authorization' => "token {$github_token}",
                    'Accept' => 'application/vnd.github.v3+json',
                ],
                'body' => json_encode(['state' => 'closed']),
            ]
        );
    }
}, 10, 3);
Storing the Mapping
Use post meta to store the relationship between roadmap items and GitHub issues. When creating a roadmap item from a GitHub issue, save the issue number as meta. When creating a GitHub issue from a roadmap item, save the issue URL as meta. This bidirectional mapping ensures updates flow correctly in both directions.
Triggering Roadmap Updates from CI/CD Pipelines
Your CI/CD pipeline knows things your roadmap does not. It knows when a build passes, when tests fail, when a deployment succeeds, and when a release is published. The REST API lets you feed this information into your roadmap automatically.
Deployment Success: Move Item to “Deployed”
When your CI/CD pipeline successfully deploys a feature to production, update the corresponding roadmap item’s status:
name: Update Roadmap on Deploy
on:
  push:
    branches: [main]

jobs:
  update-roadmap:
    runs-on: ubuntu-latest
    steps:
      - name: Extract Roadmap Item ID from Commit
        id: extract
        run: |
          # Extract item ID from commit message pattern: [ROADMAP-123]
          ITEM_ID=$(echo "${{ github.event.head_commit.message }}" | grep -oP '\[ROADMAP-\K[0-9]+')
          echo "item_id=$ITEM_ID" >> $GITHUB_OUTPUT

      - name: Update Roadmap Item Status
        if: steps.extract.outputs.item_id != ''
        run: |
          curl -X PUT \
            "${{ secrets.WP_SITE_URL }}/wp-json/product-roadmap/v1/items/${{ steps.extract.outputs.item_id }}" \
            -H "Authorization: Basic ${{ secrets.WP_API_TOKEN }}" \
            -H "Content-Type: application/json" \
            -d '{"status": "deployed"}'
Build Failure: Create a Bug Report Item
When a build fails, automatically create a roadmap item categorized as a bug so the team has visibility:
- name: Report Build Failure to Roadmap
  if: failure()
  run: |
    curl -X POST \
      "${{ secrets.WP_SITE_URL }}/wp-json/product-roadmap/v1/items" \
      -H "Authorization: Basic ${{ secrets.WP_API_TOKEN }}" \
      -H "Content-Type: application/json" \
      -d '{
        "title": "Build failure on ${{ github.ref_name }}",
        "description": "CI build failed for commit ${{ github.sha }}. Check the workflow run: ${{ github.server_url }}/${{ github.repository }}/actions/runs/${{ github.run_id }}",
        "status": "reported",
        "category": "bug",
        "board": 42
      }'
Release Published: Update Multiple Items
When you publish a release, use the batch endpoint to move all items tagged with that release version to “Released” status. This keeps the roadmap in sync with your actual release schedule without manual intervention.
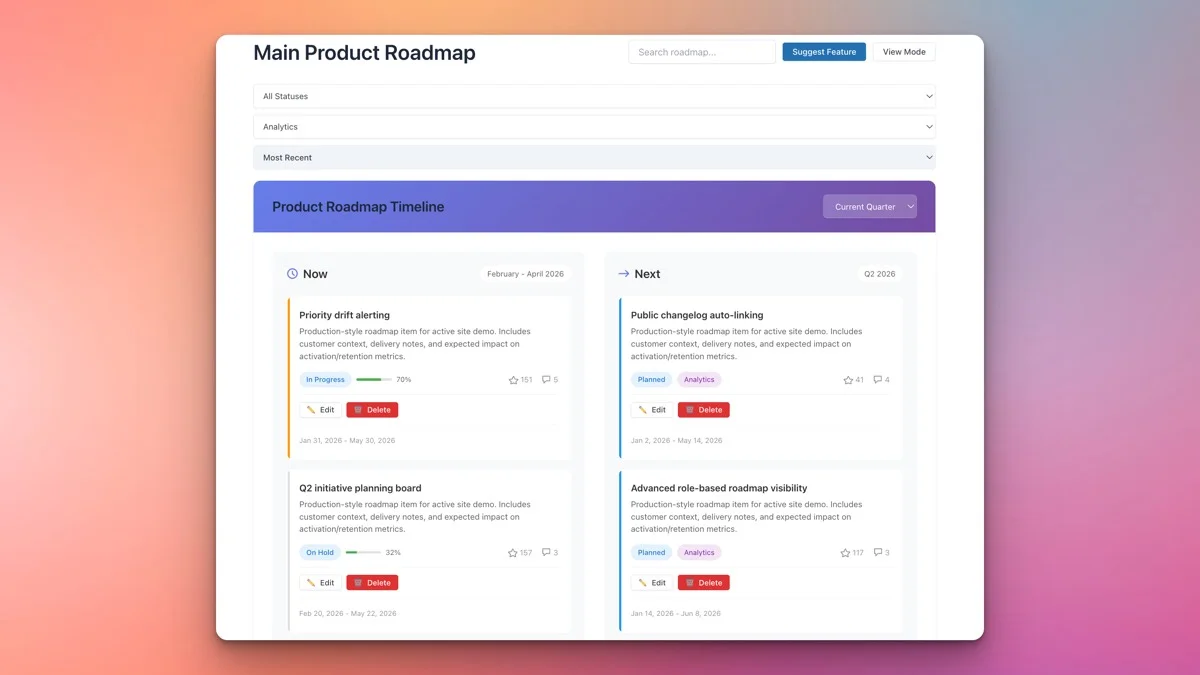
Building Custom Dashboards
The built-in kanban and timeline views cover most use cases, but sometimes you need a specialized view. The REST API makes it straightforward to build custom dashboards that pull roadmap data and present it in any format.
Executive Summary Dashboard
Build a dashboard that shows high-level metrics: total items by status, completion percentage, items added this week, average time in each status. Fetch the raw data from the API and render it with a charting library like Chart.js.
async function fetchDashboardData() {
  const [items, statuses] = await Promise.all([
    fetch('/wp-json/product-roadmap/v1/items?per_page=100', {
      headers: { 'X-WP-Nonce': wpApiSettings.nonce }
    }).then(r => r.json()),
    fetch('/wp-json/product-roadmap/v1/statuses', {
      headers: { 'X-WP-Nonce': wpApiSettings.nonce }
    }).then(r => r.json())
  ]);

  const statusCounts = {};
  statuses.forEach(s => statusCounts[s.name] = 0);
  items.forEach(item => statusCounts[item.status]++);

  return { items, statuses, statusCounts };
}
Team Velocity Dashboard
Track how many items move to “Completed” each week to measure team velocity. Fetch items with a date range filter and count completions over time. Display the trend line to spot slowdowns or acceleration in delivery.
Client-Facing Summary Widget
Create a lightweight widget for client websites that shows the top five most-voted items and their current status. The widget makes a single API call, caches the response for 15 minutes, and renders a clean, branded summary that clients can embed on their own sites if desired.
Webhook-Style Workflows with WordPress Hooks
The REST API handles inbound data, external systems pushing data into your roadmap. For outbound data, your roadmap pushing data to external systems, you need webhook-style workflows built on WordPress action hooks.
Available Hooks
The Product Roadmap plugin fires WordPress hooks at key moments in an item’s lifecycle:
product_roadmap_item_created, Fires when a new item is createdproduct_roadmap_status_changed, Fires when an item’s status changesproduct_roadmap_item_voted, Fires when an item receives a voteproduct_roadmap_item_deleted, Fires when an item is deleted
Sending Slack Notifications
Post a message to Slack whenever a roadmap item moves to “In Progress”:
add_action('product_roadmap_status_changed', function($item_id, $new_status, $old_status) {
    if ($new_status !== 'in-progress') return;

    $item = get_post($item_id);
    $webhook_url = defined('SLACK_WEBHOOK_URL') ? SLACK_WEBHOOK_URL : '';

    wp_remote_post($webhook_url, [
        'body' => json_encode([
            'text' => "Roadmap item started: *{$item->post_title}*\nStatus: {$old_status} → {$new_status}\nView: " . get_permalink($item_id)
        ]),
        'headers' => ['Content-Type' => 'application/json'],
    ]);
}, 10, 3);
Updating External Project Management Tools
If your team uses a tool like Linear, Jira, or ClickUp alongside the roadmap, use hooks to keep them in sync. When a status changes in the roadmap, fire an API call to the external tool to update the corresponding task. This ensures your roadmap remains the single source of truth while other tools stay synchronized.
Custom Webhook Dispatcher
For maximum flexibility, build a generic webhook dispatcher that sends item data to any configured URL when events occur:
add_action('product_roadmap_status_changed', function($item_id, $new_status, $old_status) {
    $webhooks = get_option('roadmap_webhooks', []);

    foreach ($webhooks as $webhook) {
        if (in_array($new_status, $webhook['statuses'])) {
            wp_remote_post($webhook['url'], [
                'body' => json_encode([
                    'event' => 'status_changed',
                    'item_id' => $item_id,
                    'title' => get_the_title($item_id),
                    'old_status' => $old_status,
                    'new_status' => $new_status,
                    'timestamp' => current_time('c'),
                ]),
                'headers' => ['Content-Type' => 'application/json'],
            ]);
        }
    }
}, 10, 3);
This pattern lets you register multiple webhook endpoints and control which status changes trigger each one. It is the WordPress equivalent of configuring webhooks in a SaaS tool.
Rate Limits and Performance Considerations
Unlike SaaS APIs that impose strict rate limits, the Product Roadmap REST API runs on your own server. This means the limits are defined by your hosting environment, not by artificial restrictions.
Server-Side Considerations
Each API request triggers WordPress’s bootstrap process, plugin loading, and database queries. On shared hosting, rapid-fire API calls can strain resources. On a VPS or dedicated server, the limits are much higher. As a general guideline:
- Shared hosting: Keep requests under 10 per minute for write operations
- VPS (2-4 GB RAM): Comfortable with 30-60 requests per minute
- Dedicated/cloud hosting: Hundreds of requests per minute with proper caching
Caching Strategies
For read-heavy integrations (dashboards, status displays), implement caching at the integration layer. Cache API responses for 1-5 minutes and serve from cache for repeated requests. This dramatically reduces load on your WordPress server.
WordPress object caching (Redis or Memcached) also helps. If your hosting environment supports persistent object caching, the API’s database queries are automatically cached, improving response times for repeated requests with the same parameters.
Pagination for Large Datasets
If your roadmap has hundreds of items, always paginate your API requests. Fetching all items in a single request puts unnecessary load on the server and increases response time. Use the per_page and page parameters to retrieve items in manageable chunks.
def fetch_all_items():
    items = []
    page = 1
    while True:
        response = requests.get(
            f"{SITE_URL}/wp-json/product-roadmap/v1/items",
            params={"per_page": 100, "page": page},
            auth=HTTPBasicAuth(USERNAME, APP_PASSWORD)
        )
        batch = response.json()
        if not batch:
            break
        items.extend(batch)
        page += 1
    return items
Security Best Practices for API Integrations
Opening up API access requires attention to security. Here are the practices that keep your roadmap data safe.
Principle of Least Privilege
Create a dedicated WordPress user for API access with only the capabilities needed. If your GitHub integration only needs to create and update items, do not give it administrator access. Create a custom role with the specific capabilities the integration requires.
Rotate Application Passwords
Application passwords do not expire by default, but you should rotate them periodically. WordPress lets you create multiple application passwords per user, so you can create a new one, update your integrations, and revoke the old one without downtime.
Use HTTPS Exclusively
All API requests must go over HTTPS. Application passwords sent over plain HTTP are vulnerable to interception. Modern hosting environments provide free SSL certificates through Let’s Encrypt, so there is no excuse for unencrypted API traffic.
Monitor API Access
Log API requests to detect unauthorized access or unusual patterns. A security plugin like Wordfence can monitor REST API access, or you can add custom logging to your integration code. If you see requests from unexpected IP addresses or abnormal volumes, investigate immediately.
Practical Integration Architecture
Here is a reference architecture for a typical development team that wants to connect their WordPress roadmap to their full development workflow:
- GitHub Issues → GitHub Action → REST API → Roadmap item created
- Roadmap status change → WordPress hook → Slack webhook → Team notified
- CI/CD pipeline success → GitHub Action → REST API → Roadmap item updated to “Deployed”
- Roadmap item completed → WordPress hook → GitHub API → GitHub issue closed
- Custom dashboard → REST API read → Executive summary rendered
Each connection is a simple HTTP request. No middleware required. No Zapier subscription. No third-party integration platforms. Your WordPress site becomes the integration hub, and the REST API is the interface that everything else connects to.
Getting Started with Your First Integration
If you are new to the Product Roadmap API, start small. Here is a suggested progression:
- Week 1: Set up application passwords and make your first GET request to list items. Verify that authentication works and you can read data.
- Week 2: Write a script that creates a roadmap item from the command line. This confirms that write operations work and you understand the data model.
- Week 3: Set up a GitHub Action that creates roadmap items from issues labeled “roadmap.” This is your first real automation.
- Week 4: Add a WordPress hook that sends Slack notifications on status changes. This completes the feedback loop between your roadmap and your team communication.
Each step builds on the previous one, and by the end of the month you have a fully integrated workflow that keeps your roadmap in sync with your development tools.
Final Thoughts
A roadmap that exists in isolation is a documentation tool. A roadmap connected to your development workflow is a coordination engine. The Product Roadmap plugin’s REST API transforms your WordPress roadmap from a static display into an active participant in your development process.
GitHub issues flow in. Status updates flow out. CI/CD pipelines update progress. Custom dashboards display real-time data. And through all of it, your roadmap remains the single source of truth that everyone, developers, project managers, and clients, can reference.
The API is already built. Your development tools already speak HTTP. The only thing left is connecting them.
Get the Product Roadmap plugin (Pro) and start building integrations that make your roadmap the hub of your development workflow.