
Why Client Sites Need First-Party Ad Analytics
If you run ads on a WordPress site, whether for your own products or for paying advertisers, you need data you can trust. Third-party analytics platforms like Google Analytics provide broad traffic metrics, but they fall short when it comes to granular ad performance tracking. Cookie consent banners block scripts. Ad blockers strip tracking pixels. And even when data does come through, it lives on someone else’s server, governed by someone else’s privacy policy.
First-party ad analytics solve these problems by keeping the entire tracking pipeline within your WordPress installation. Every impression fires a server-side event. Every click routes through your own domain. The data sits in your own database, available for querying, exporting, and auditing without a single external dependency.
For agencies managing client sites, this approach eliminates the “our numbers don’t match” conversation. When the ad server and the analytics platform are the same system, discrepancies vanish. For publishers selling ad space directly, first-party data becomes the source of truth for billing, performance reviews, and renewal negotiations. If you are building a sales pipeline tracking system, accurate ad data feeds directly into revenue attribution.
WB Ad Manager Pro was built around this principle. Rather than bolting analytics onto an ad-serving plugin as an afterthought, tracking is woven into the core architecture. The result is a system where every ad placement generates reliable, auditable data from the moment it goes live.
Understanding Impression Tracking Mechanics
An impression, in its simplest definition, is the event that fires when an ad renders in a visitor’s browser. But the devil is in the details. Does the impression count when the page loads, or when the ad actually enters the viewport? How do you handle cached pages where the HTML never hits the server? What about bots and crawlers that inflate numbers without representing real eyeballs?
WB Ad Manager Pro addresses these questions with a layered tracking approach. At the base layer, every ad placement registers a server-side impression when the ad content is rendered into the page template. This provides a reliable baseline that works regardless of JavaScript availability.
Server-Side vs. Client-Side Impressions
Server-side tracking counts the impression at render time. The WordPress template calls the ad function, the ad HTML is generated, and the impression counter increments. This method is immune to ad blockers and JavaScript failures, but it can overcount when pages are served from cache without hitting the origin server.
Client-side tracking uses a lightweight JavaScript snippet that fires when the ad enters the browser viewport. This approach is more accurate for measuring actual viewability, but it can undercount when visitors have JavaScript disabled or when ad blockers strip the tracking code.
The best approach uses both. WB Ad Manager Pro records server-side impressions as the primary metric and supplements them with client-side viewability data. When the two numbers diverge significantly, you know something is happening with caching or blocking that warrants investigation.
Handling Page Caching
Full-page caching is essential for WordPress performance, but it creates a blind spot for server-side ad tracking. When a cached page serves an ad, the PHP code that would normally increment the impression counter never executes.
WB Ad Manager Pro handles this through asynchronous impression logging. Instead of counting impressions inline during page render, the plugin uses a non-blocking AJAX endpoint. When the cached page loads in the browser, a small script pings the tracking endpoint with the ad placement details. The endpoint validates the request, checks for duplicate submissions, and records the impression.
This approach preserves cache efficiency while maintaining accurate impression counts. The tracking request is small (under 200 bytes), non-render-blocking, and fires after the page content has finished loading.
Bot Filtering
Raw impression counts always include some percentage of non-human traffic. Search engine crawlers, uptime monitors, and malicious bots all trigger page loads that can inflate impression numbers.
The plugin includes a configurable bot-filtering layer that examines the user agent string, checks against known bot IP ranges, and applies rate-limiting rules. Requests identified as non-human are flagged in the database but excluded from the default impression counts shown in reports.

Click Tracking and CTR Calculations
Click tracking records the moment a visitor interacts with an ad by clicking on it. While conceptually straightforward, reliable click tracking requires attention to several implementation details.
How Click Tracking Works
When WB Ad Manager Pro renders an ad, the click-through URL is wrapped in a tracking redirect. Instead of linking directly to the advertiser’s landing page, the ad links to an internal tracking endpoint that records the click event and then redirects the visitor to the final destination.
The tracking endpoint logs the following data for each click:
- Timestamp – The exact time of the click event
- Ad ID – Which ad was clicked
- Placement ID – Where the ad was displayed
- Referrer URL – The page the visitor was on when they clicked
- User agent – Browser and device information
- IP hash – A one-way hash for fraud detection (not the raw IP)
- Session ID – An anonymized session identifier
The redirect happens in milliseconds, so visitors experience no perceptible delay. The tracking endpoint returns a 302 redirect header, which browsers follow immediately without rendering an intermediate page.
Click Fraud Prevention
Not every click is legitimate. Competitors may click on ads to drain budgets. Bots may follow links systematically. Even well-meaning visitors sometimes double-click or click repeatedly out of frustration.
WB Ad Manager Pro includes several fraud-prevention mechanisms:
- Rate limiting – No more than a configurable number of clicks from the same session within a time window are counted
- IP-based deduplication – Multiple clicks from the same IP hash within a short period are flagged
- Bot detection – The same bot-filtering rules used for impressions apply to clicks
- Referrer validation – Clicks without a valid referring page from your domain are flagged as suspicious
Flagged clicks are stored separately so they can be reviewed and, if legitimate, included in reports. This approach avoids discarding real clicks while keeping fraud out of the default metrics.
Calculating Click-Through Rate
Click-through rate (CTR) is the most commonly used metric for evaluating ad performance. The formula is straightforward:
CTR = (Total Clicks / Total Impressions) x 100
A banner ad with 10,000 impressions and 150 clicks has a CTR of 1.5%. Industry benchmarks for display ads typically range from 0.1% to 0.5%, so a 1.5% CTR would indicate strong performance.
WB Ad Manager Pro calculates CTR automatically for every ad and every placement. The dashboard displays CTR alongside raw impression and click counts, and the metric is available in all exports and API responses.
The plugin also tracks CTR trends over time. A declining CTR on a long-running ad often signals creative fatigue, where the same audience has seen the ad too many times and stops engaging. This is a clear signal to rotate the creative or adjust the targeting. For a deeper look at how to run structured experiments on your ad creatives, see our guide on A/B testing WordPress ads.
Building Custom Reports with CSV Exports
Raw data is valuable, but reports turn data into decisions. WB Ad Manager Pro includes a report builder that lets you slice analytics data by date range, ad, placement, advertiser, and campaign.
Report Types
The built-in report builder supports several report types:
- Performance Summary – Impressions, clicks, CTR, and revenue for each ad over a selected period
- Placement Analysis – Compare how the same ad performs across different placements (header vs. sidebar vs. in-content)
- Advertiser Report – A rollup of all ads for a specific advertiser, suitable for sharing with clients
- Campaign Report – Performance data grouped by campaign, with start/end dates and budget utilization
- Time Series – Daily, weekly, or monthly breakdowns of any metric, useful for spotting trends and seasonality
CSV Export Workflow
Every report can be exported to CSV with a single click. The export includes all data points visible in the report, plus additional fields like ad creative URL, placement shortcode, and campaign status.
CSV exports are formatted for immediate use in spreadsheet applications. Column headers use human-readable names, dates follow ISO 8601 format, and numeric fields use consistent decimal precision. This means you can open the file in Excel or Google Sheets and start analyzing without reformatting.
For automated workflows, exports can be triggered via the REST API (covered in the next section), enabling you to pull report data into external business intelligence tools, billing systems, or custom dashboards. If you need full programmatic access, check out our guide on managing WordPress ads via REST API.
Scheduled Reports
For ongoing client relationships, manually generating reports every month is tedious. WB Ad Manager Pro supports scheduled report generation. You define the report parameters once, set a schedule (weekly, bi-weekly, monthly), and the plugin generates the report automatically and stores it for download.
Combined with WordPress email hooks, you can even set up automatic delivery of CSV reports to client email addresses, turning your WordPress site into a self-service ad reporting platform.
REST API for External Tools
Not every analytics consumer is a human looking at a dashboard. External systems, third-party reporting tools, programmatic buying platforms, and custom client portals all need access to ad performance data.
WB Ad Manager Pro exposes a comprehensive REST API that covers all analytics functionality. The API follows WordPress REST API conventions, uses standard authentication methods, and returns JSON responses.
Key Analytics Endpoints
GET /wp-json/wb-ad-manager/v1/analytics/impressions
GET /wp-json/wb-ad-manager/v1/analytics/clicks
GET /wp-json/wb-ad-manager/v1/analytics/ctr
GET /wp-json/wb-ad-manager/v1/analytics/reports
GET /wp-json/wb-ad-manager/v1/analytics/export
Each endpoint accepts query parameters for date range, ad ID, placement ID, advertiser ID, and campaign ID. Pagination is built in, with configurable page sizes up to 100 records per request.
Authentication
The API supports three authentication methods:
- Application Passwords – Built into WordPress core since version 5.6, ideal for server-to-server integrations
- JWT Tokens – For single-page applications and headless frontends
- API Keys – Generated per-advertiser for read-only access to their own data
Rate limiting is configurable per authentication method. Application passwords might get 1,000 requests per hour, while advertiser API keys might be limited to 100.
Webhook Notifications
For real-time integrations, the API supports webhook notifications. You can register webhook URLs that receive POST requests when certain events occur:
- An ad reaches a click threshold
- A campaign budget is exhausted
- CTR drops below a configured minimum
- A new advertiser signs up
Webhooks enable reactive workflows without polling. When an ad’s budget runs out, your billing system can be notified immediately to generate an invoice or pause the campaign.
Avoiding Analytics Bloat
Ad analytics generate a lot of data. Every impression and every click creates a database row. On a high-traffic site serving multiple ads per page, the tracking tables can grow by tens of thousands of rows per day.
Left unchecked, this growth degrades database performance, inflates backup sizes, and slows down report generation. WB Ad Manager Pro includes several mechanisms to keep analytics data manageable.
Data Aggregation
Raw event data (individual impressions and clicks) is retained for a configurable period, typically 30 to 90 days. After the retention period, raw events are aggregated into hourly and daily summary tables. The summaries retain all the dimensional breakdowns (by ad, placement, campaign) but compress thousands of individual events into single summary rows.
This approach keeps recent data available at full granularity for debugging and fraud analysis while preventing indefinite table growth.
Efficient Storage
The tracking tables use optimized schemas with appropriate indexes. Integer IDs reference ads and placements instead of storing full strings in every row. Timestamps use MySQL’s native datetime type. IP hashes use fixed-length binary columns.
The result is a storage footprint of approximately 100 bytes per raw impression event and 200 bytes per click event. A site logging 100,000 impressions per day generates about 10 MB of raw data daily, or roughly 300 MB per month before aggregation.
Database Maintenance
The plugin registers a WordPress cron job that runs daily to perform maintenance tasks: aggregating old raw data, optimizing table indexes, and clearing expired cache entries. This runs during low-traffic periods and typically completes in under a minute even on tables with millions of rows.
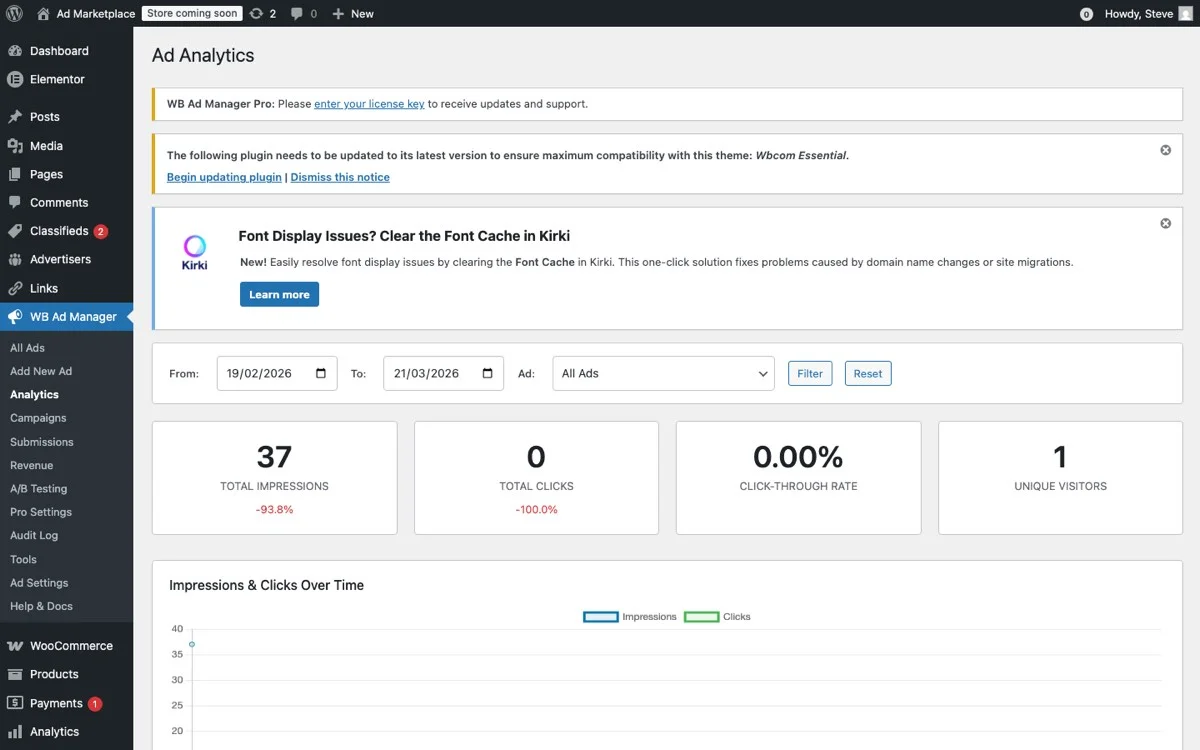
Setting Up the Analytics Dashboard
Getting WB Ad Manager Pro’s analytics up and running involves a few configuration steps after installation.
Step 1: Enable Tracking
Navigate to WB Ad Manager > Settings > Analytics in the WordPress admin. Enable both server-side and client-side impression tracking. Set the bot-filtering level (low, medium, or high) based on your traffic profile. High-traffic sites that attract more bot traffic should use the medium or high setting.
Step 2: Configure Data Retention
Set the raw data retention period. The default is 90 days, which provides a good balance between granularity and storage. If storage is a concern, reduce this to 30 days. If you need granular data for longer periods (for example, for annual billing reconciliation), extend it to 180 or 365 days.
Step 3: Set Up Click Tracking
Click tracking is enabled by default for all ads. You can configure the fraud-prevention settings under Settings > Click Tracking. The default rate limit of 5 clicks per session per hour works well for most sites. Adjust upward for sites with highly engaged audiences where legitimate repeat clicks are common.
Step 4: Create Your First Report
Once ads are running and data is flowing, navigate to WB Ad Manager > Reports. Select a report type, choose your date range and filters, and click Generate. The report renders in the browser with sortable columns and inline charts. Click Export CSV to download the data for further analysis.
Step 5: Configure API Access
If you need external access to analytics data, navigate to Settings > API. Generate an API key for each integration or advertiser. Set the appropriate rate limits and permissions (read-only for advertisers, read-write for internal systems).
Step 6: Set Up Scheduled Reports
For recurring reports, configure the schedule under Reports > Schedules. Select the report parameters, choose a frequency, and optionally add email recipients. The first scheduled report generates at the next scheduled interval.
Real-World Analytics Scenarios
To put all of this in context, here are three scenarios where WB Ad Manager Pro’s analytics capabilities make a measurable difference.
Scenario 1: Publisher Selling Direct Ads
A niche blog selling sidebar and in-content ad placements to industry advertisers needs accurate impression and click data for billing. Using WB Ad Manager Pro, the publisher generates monthly advertiser reports that show exactly how many impressions and clicks each ad received. The CSV export feeds directly into the invoicing system, and the advertiser portal gives clients real-time access to their own data.
Scenario 2: Agency Managing Multiple Client Sites
A WordPress agency manages 20 client sites, each running promotional banners for the client’s own products. The agency uses the REST API to pull analytics data from all 20 sites into a central dashboard. Weekly automated reports show which promotions are performing and which need creative refreshes. For agencies already using CRM integrations, this data pairs well with automated customer management workflows.
Scenario 3: Membership Site with Sponsor Ads
A membership site displays sponsor ads to free-tier users while keeping the experience ad-free for paying members. WB Ad Manager Pro’s analytics track impressions and clicks only for the ad-supported tier, providing clean data for sponsor reports. The time-series reports show how ad engagement correlates with free-tier traffic, helping the site optimize its conversion funnel.
Get Started with WB Ad Manager Pro
Reliable ad analytics are the foundation of any monetization strategy. Without accurate data on impressions, clicks, and engagement, you are guessing at what works and what does not.
WB Ad Manager Pro gives you first-party analytics that stay inside your WordPress installation, built-in fraud prevention, flexible reporting with CSV exports, and a full REST API for external integrations. Whether you are a publisher, an agency, or a site owner running your own promotions, the plugin provides the data infrastructure you need to make informed decisions.
Download WB Ad Manager Pro and start tracking every impression and click on your WordPress site today.