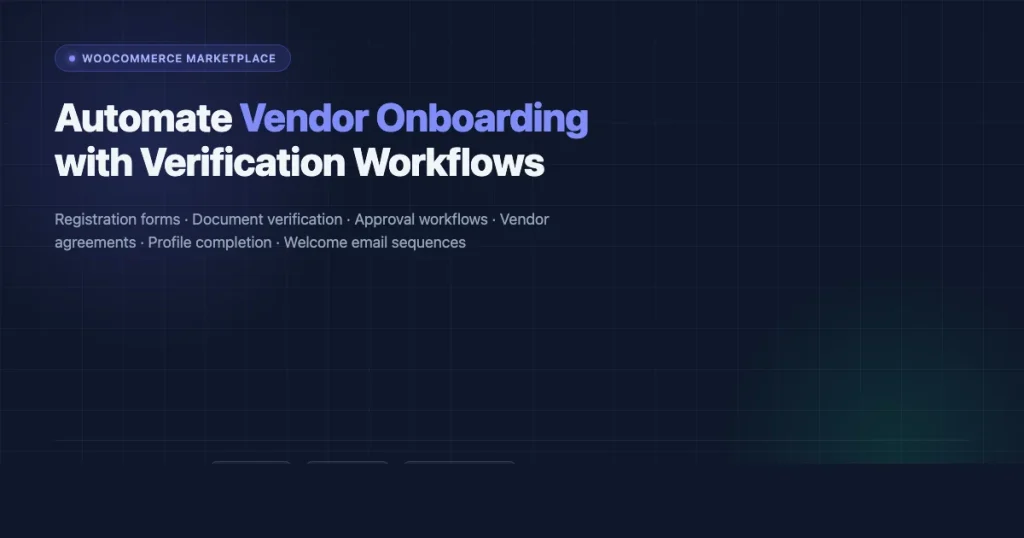
Getting vendors live on your WooCommerce marketplace takes work. Without a structured process, registration data ends up inconsistent, documents go unreviewed, and vendors start selling before you’ve verified anything important. This guide walks through how to build a reliable onboarding workflow using Dokan, WCFM Marketplace, and WC Vendors, covering registration forms, document verification, approval logic, vendor agreements, and automated welcome email sequences.
Why Vendor Onboarding Needs a Process
Most marketplace operators start by manually reviewing every vendor application. That works at five vendors. At fifty, it creates a bottleneck. At five hundred, it becomes the single biggest operational drain in the business.
A well-structured WooCommerce vendor onboarding workflow does three things automatically: it collects the right information upfront, routes applications through the right approval logic, and sends vendors the right communication at each stage. When any of those three break down, vendors either disappear before completing setup or go live without meeting your marketplace standards.
The good news is that all three major multi-vendor plugins, Dokan, WCFM Marketplace, and WC Vendors, have hooks and settings that let you build this entire flow without custom code for most cases. We’ll cover where to find each setting and when custom code becomes necessary. Before vendors start selling, you’ll also want to think about how you handle WooCommerce chargebacks, vendor onboarding is the best time to set expectations around dispute policies.
Step 1: Configure the Vendor Registration Form
The registration form is where onboarding starts. Each plugin handles this differently.
Dokan Registration Fields
In Dokan, go to WP Admin → Dokan → Settings → Vendor Registration. You’ll see toggles for fields like store name, store URL, phone, and address. Enable Enable Vendor Registration at the top to make the vendor tab appear on your WooCommerce My Account page.
To add custom fields to the Dokan registration form, use the dokan_vendor_registration_required_fields filter and the dokan_new_vendor_created action hook. A basic example:
add_filter( 'dokan_vendor_registration_required_fields', function( $fields ) {
    $fields['business_type'] = __( 'Business Type', 'your-textdomain' );
    return $fields;
});

add_action( 'dokan_new_vendor_created', function( $vendor_id, $dokan_settings ) {
    if ( isset( $_POST['business_type'] ) ) {
        update_user_meta( $vendor_id, 'business_type', sanitize_text_field( $_POST['business_type'] ) );
    }
}, 10, 2 );
WCFM Marketplace Registration
WCFM handles registration through WP Admin → WCFM → Settings → General → Registration. You can enable a registration wizard that walks vendors through setup steps. WCFM also supports a Membership module that gates vendor registration behind a paid plan, useful if you want vendors to buy into your marketplace before applying.
Custom fields in WCFM use the wcfm_registration_fields filter:
add_filter( 'wcfm_registration_fields', function( $fields ) {
    $fields['vendor_category'] = array(
        'label'       => __( 'Product Category', 'your-textdomain' ),
        'type'        => 'select',
        'options'     => array( 'electronics', 'clothing', 'home-goods' ),
        'required'    => true,
    );
    return $fields;
});
WC Vendors Registration
WC Vendors uses WP Admin → WC Vendors → Settings → General. The free version is lighter on registration customization. WC Vendors Pro adds a full Pro Dashboard with configurable registration forms and field management from the admin panel without code.
Step 2: Set Up Document Verification
Document verification is where most marketplace operators hit gaps. Asking vendors to upload a government ID or business license requires you to store, review, and track those files, and none of the three plugins include this out of the box in their free versions.
Option A: Dokan Vendor Verification Add-On
Dokan Pro includes a Vendor Verification module. Enable it at WP Admin → Dokan → Modules → Vendor Verification. Once active, you get:
- ID verification request (drivers license, passport, national ID)
- Address verification with document upload
- Social profile verification (Twitter, Facebook, LinkedIn)
- Company information fields
Vendors complete verification from their Dokan dashboard at /store-dashboard/verification/. Admins review submitted documents at WP Admin → Dokan → Vendor Verifications. You can approve or reject each document type independently. Rejected documents trigger a notification to the vendor with the reason.
To block vendors from selling until verified, use the dokan_vendor_is_seller_active filter:
add_filter( 'dokan_vendor_is_seller_active', function( $is_active, $user ) {
    $verification_status = get_user_meta( $user->ID, 'dokan_verification_status', true );
    if ( 'approved' !== $verification_status ) {
        return false;
    }
    return $is_active;
}, 10, 2 );
Option B: WCFM Marketplace with Store Policy
WCFM does not ship a dedicated document upload module. The common approach is to use WCFM → Store Policy combined with a custom file upload field on registration. Store the uploaded file path in user meta and build an admin review UI using standard WordPress list tables or a simple custom post type per vendor application.
For marketplaces that need serious document management on WCFM, the User Verification plugin by WPGuru or a general-purpose document collection form (Gravity Forms + File Upload field + notification email to admin) is the most practical path without going fully custom.
Option C: Manual Review with Custom Post Type
If you need full control regardless of which multi-vendor plugin you use, create a vendor_application custom post type. On vendor registration, create a post with the vendor’s user ID and uploaded document URLs as post meta. Build a simple admin list view with approve/reject buttons. This approach works with any plugin and gives you a clean audit trail.
Step 3: Build Approval Workflows
Approval workflows control whether vendors can start selling immediately after registration or only after admin review.
Dokan: Admin Approval Mode
Go to WP Admin → Dokan → Settings → Selling Options. Set New Vendor Enablement to Inactive. This puts every new vendor in a pending state. You approve them individually at WP Admin → Dokan → Vendors.
For automated conditional approval, for example, auto-approve vendors who filled in all required fields and uploaded a document, hook into dokan_new_vendor_created and check your conditions before calling dokan_vendor_status_change():
add_action( 'dokan_new_vendor_created', function( $vendor_id, $dokan_settings ) {
    $has_doc    = get_user_meta( $vendor_id, 'uploaded_business_doc', true );
    $has_phone  = get_user_meta( $vendor_id, 'phone', true );

    if ( $has_doc && $has_phone ) {
        update_user_meta( $vendor_id, 'dokan_enable_selling', 'yes' );
    }
}, 10, 2 );
WCFM: Approval Settings
In WCFM, go to WP Admin → WCFM → Settings → General → Store Approval. Set Approve New Vendor to Admin Approve. Pending vendors appear in WP Admin → WCFM → Vendors with an Approve button. You can also use the wcfm_vendor_registration_done hook for custom approval logic.
WC Vendors: Selling Permissions
WC Vendors controls selling through the Vendor user role. By default, new users who apply get the Vendor role immediately. To require admin approval, remove the auto-role assignment and add a custom role like Pending Vendor. Use the wc_vendors_application_received hook to send an internal notification, then promote to the full Vendor role after review.
Step 4: Automate Vendor Agreements
Getting vendors to read and agree to your marketplace terms before they go live is not just a legal consideration, it reduces disputes when commission rates, return policies, or shipping rules later become points of friction.
Dokan Terms and Conditions
Dokan has a built-in Terms and Conditions option at WP Admin → Dokan → Settings → Vendor Registration → Terms and Conditions. Enable it, then select the page that contains your marketplace agreement. A checkbox with a link to the page appears on the registration form. The acceptance is saved in user meta under dokan_toc_enabled.
WCFM Terms on Registration
WCFM lets you add a terms checkbox to the registration form via WCFM → Settings → General → Registration → Terms & Conditions Page. Select the page and save. If you need vendors to re-agree when you update your terms, store the agreement version in user meta and compare against the current version on login.
Timestamped Agreement Records
For any marketplace operating with real vendor contracts, save a timestamp and the version of the agreement the vendor accepted. Add this to your dokan_new_vendor_created or wcfm_vendor_registration_done hook:
add_action( 'dokan_new_vendor_created', function( $vendor_id, $dokan_settings ) {
    update_user_meta( $vendor_id, 'toc_accepted_version', '2025-01' );
    update_user_meta( $vendor_id, 'toc_accepted_timestamp', current_time( 'mysql' ) );
}, 10, 2 );
Step 5: Enforce Profile Completion Before Selling
A vendor who registered but never completed their store profile causes problems, their product pages look empty, their store page shows no information, and customers don’t convert. The fix is to check profile completeness before allowing them to add products or go live.
In Dokan, the Profile Completeness feature lives at WP Admin → Dokan → Settings → Selling Options → Profile Completion Progress Bar. Enable it and set a minimum completion percentage. Vendors below the threshold see a notice on their dashboard and cannot enable selling.
If your vendors sell WooCommerce custom product types, profile completion should also include confirming the product categories they plan to list, this helps your approval workflow route specialized vendor applications to the right reviewer.
For WCFM and WC Vendors, you’ll build this check yourself. The pattern is:
- Define an array of required meta fields (store name, description, logo, phone, address)
- Check for empty values on each
- Return a completeness score as a percentage
- Gate the product creation capability until the score hits your threshold
function marketplace_vendor_completeness( $vendor_id ) {
    $required = array( 'store_name', 'store_description', 'vendor_logo', 'phone', 'address' );
    $filled   = 0;

    foreach ( $required as $field ) {
        if ( ! empty( get_user_meta( $vendor_id, $field, true ) ) ) {
            $filled++;
        }
    }

    return ( $filled / count( $required ) ) * 100;
}
Step 6: Set Up Automated Welcome Email Sequences
A welcome email sent immediately on registration sets expectations. A follow-up three days later pushes vendors who haven’t finished setup to complete their profile. A final nudge at day seven captures the ones who went quiet.
Email 1: Registration Confirmed (Sent Immediately)
This email confirms the application was received and tells vendors what happens next. Subject line: Your [Marketplace Name] vendor application is in, here’s what comes next. Body should include: what documents they need to submit, how long review takes, and the URL to their vendor dashboard.
Trigger this using WooCommerce’s built-in email class or a plugin like FluentCRM or Groundhogg. With FluentCRM, create an automation with the trigger User Role Changed (to Vendor or Pending Vendor) and send the email immediately.
Email 2: Profile Completion Reminder (Day 3)
Subject: Finish setting up your [Marketplace Name] store. Send only to vendors whose profile completeness score is below 100%. Include a direct link to the vendor dashboard and a checklist of what’s missing. With FluentCRM, add a condition check on your custom vendor_completeness user meta field before sending.
Email 3: Go-Live Confirmation
Trigger this from the admin approval action. In Dokan, hook into dokan_vendor_enabled. In WCFM, hook into wcfm_vendor_approved. Send a transactional email confirming the vendor is now live, with links to add their first product and review their store page.
add_action( 'dokan_vendor_enabled', function( $vendor_id ) {
    $vendor = dokan()->vendor->get( $vendor_id );
    $email  = $vendor->get_email();

    $headers = array( 'Content-Type: text/html; charset=UTF-8' );
    $subject = 'Your store is live on ' . get_bloginfo( 'name' );
    $message = 'Congratulations! Your vendor account is approved. Add your first product here: ' . dokan_get_seller_product_add_url();

    wp_mail( $email, $subject, $message, $headers );
});
Manual vs Automated Verification: When to Use Each
Not every marketplace needs the same level of scrutiny. Here’s how to think about the trade-off:
| Marketplace Type | Recommended Approach | Tooling |
|---|---|---|
| General goods, low risk | Auto-approve + email verification | WC Vendors + FluentCRM |
| Service providers, freelancers | Manual review of portfolio/ID | Dokan Verification Module |
| Regulated products (food, health) | Full document review + agreement sign | Custom CPT + Dokan/WCFM hooks |
| High-volume platform (100+ vendors/mo) | Auto-approve tier 1, manual for edge cases | Conditional logic via registration hooks |
The rule of thumb: automate what’s consistent (email send, role assignment, profile completeness check) and keep a human in the loop for anything that requires judgment (document authenticity, business registration validity).
Checklist: Before You Ship Your Onboarding Flow
- Registration form collects all required fields and validates on submission
- Vendor approval is set to Admin Approve (not auto-approve) if your marketplace has any risk
- Document uploads route to a reviewable admin view, not just a file in /uploads/
- Terms and conditions checkbox is required with a timestamped acceptance record
- Profile completeness gate prevents product publishing below your threshold
- Welcome email sends immediately on registration
- Day 3 reminder sends only to incomplete profiles
- Go-live email triggers from the approval action, not a scheduled send
- Test the full flow with a staging vendor account before going live
Ready to Build Your Marketplace Onboarding Flow?
A solid vendor onboarding process is one of those things that pays back every hour you put in. Vendors who go through a clear, automated flow start selling faster, hit fewer support questions, and stay on your platform longer. Start with the approval settings in your plugin of choice, add document verification, wire up a three-email sequence, and you have a working onboarding system by the end of the week.
Need help building a custom vendor onboarding workflow for your WooCommerce marketplace? Get in touch, we build these systems every day.