WooCommerce ships with support for PayPal and Stripe out of the box. For stores serving customers in Europe, South Asia, or Southeast Asia, those two gateways are rarely enough. Customers in India expect to see Razorpay or Paytm. Dutch customers reach for iDEAL. German buyers want SOFORT or Klarna. Offering only the payment methods your platform defaults to means losing customers at the single most critical step of the purchase journey – checkout.
This guide walks through building a complete custom payment gateway for WooCommerce using the WC_Payment_Gateway class. We cover the architecture, the required methods, regional payment method considerations, PCI compliance implications, and a complete testing checklist. Whether you are integrating Razorpay, Mollie, Paytm, or a regional bank API, the core pattern is the same.
How WooCommerce Payment Gateways Work
Every payment gateway in WooCommerce – whether bundled, from a plugin, or custom-built – is a class that extends WC_Payment_Gateway. WooCommerce loads all registered gateways and displays them on the checkout page. When a customer completes checkout, WooCommerce calls the gateway’s process_payment() method, which returns either a success response with a redirect URL, or a failure response with an error notice.
The lifecycle of a payment looks like this:
- Customer selects the payment method on checkout
- Customer submits the checkout form
- WooCommerce calls
process_payment( $order_id )on your gateway class - Your gateway calls the external payment API
- On success, the gateway marks the order as processing or on-hold and returns a redirect URL
- Customer is redirected to the payment provider (for redirect-based flows) or payment is captured inline (for direct methods)
- Payment provider sends a webhook or return URL callback to your site
- Your callback handler verifies the payment and marks the order as paid
Understanding this flow is essential before writing a single line of gateway code. The two most common architectures for regional payment methods are redirect-based (Razorpay, Mollie, Paytm) and iFrame-based (Stripe Elements, Braintree). Both implement the same WC_Payment_Gateway interface, but the checkout UX and callback handling differ.
Setting Up the Gateway Plugin Structure
Payment gateways should be built as standalone plugins, not added to your theme’s functions.php. A theme change would disable your gateway, which is catastrophic for a live store. The minimal plugin structure looks like this:
my-gateway/
├── my-gateway.php
├── includes/
│   ├── class-wc-my-gateway.php
│   └── class-wc-my-gateway-api.php
├── assets/
│   ├── js/checkout.js
│   └── css/checkout.css
└── templates/
    └── payment-form.php
In your main plugin file, register the gateway with WooCommerce using the woocommerce_payment_gateways filter:
This tells WooCommerce to include your class when it loads all available gateways. The class itself does not load until WooCommerce needs it, keeping performance impact minimal.
Building the WC_Payment_Gateway Class
Your gateway class must extend WC_Payment_Gateway and implement a set of required and recommended methods. Here is the complete structure with all mandatory properties and methods:
The __construct method sets gateway metadata (ID, title, description) and loads your settings. The init_form_fields() method defines what appears in the WooCommerce admin gateway settings page. Every gateway needs at minimum an enable/disable toggle and fields for any API credentials.
Required Methods
| Method | Required | Purpose |
|---|---|---|
__construct() | Yes | Set gateway properties, load settings, init hooks |
init_form_fields() | Yes | Define admin settings fields |
process_payment( $order_id ) | Yes | Call payment API, return success/fail array |
payment_fields() | Recommended | Render checkout form fields (card number, etc.) |
validate_fields() | Recommended | Server-side validation before process_payment |
receipt_page( $order_id ) | Redirect-based | Render redirect form or auto-redirect to payment page |
webhook() | Yes (for async) | Handle payment provider IPN/webhook callback |
can_refund_order( $order ) | Recommended | Enable WooCommerce refund button in admin |
process_refund( $order_id, $amount ) | Recommended | Call payment API refund endpoint |
Implementing process_payment()
The process_payment() method is the heart of your gateway. It must return an associative array with result (either 'success' or 'failure') and, on success, a redirect URL. Here is a complete implementation for a redirect-based regional gateway:
On failure, call wc_add_notice( 'Error message', 'error' ) and return array( 'result' => 'failure' ). WooCommerce will display the error notice and keep the customer on the checkout page. Never throw exceptions from process_payment() – WooCommerce does not catch them in all versions.
Handling Payment Callbacks and Webhooks
For redirect-based gateways, payment confirmation arrives asynchronously – either as a webhook from the payment provider’s server (preferred), or as a return URL redirect when the customer comes back to your site. You need to handle both scenarios because return URL callbacks can fail if the customer closes the browser.
Register a custom REST endpoint or use WooCommerce’s built-in webhook listener at /?wc-api=your_gateway_id:
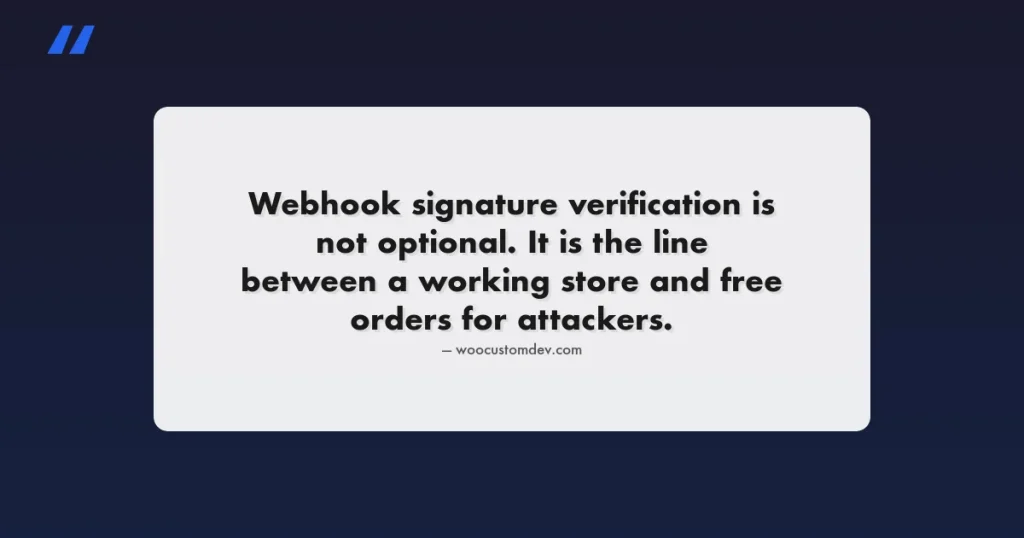
The webhook URL for this pattern is https://yourstore.com/?wc-api=my_regional_gateway. Register this URL in your payment provider’s dashboard as the IPN/webhook endpoint. Always verify webhook signatures before processing – every major payment provider sends a signature header that you can verify with their SDK or a simple HMAC check.
Webhook Security – Signature Verification
Never process a webhook without verifying its authenticity. For Razorpay, Mollie, Paytm, and most other payment providers, signature verification looks like this:
The raw request body must be captured before WordPress parses it. Use file_get_contents('php://input') at the very start of your webhook handler, before any PHP JSON parsing happens. Once you call json_decode, the raw body is no longer available from the input stream.
Regional Payment Methods: Razorpay, Mollie, and Paytm
Each regional payment provider has its own API design, authentication model, and checkout flow. Here is what you need to know about the three most requested integrations.
Razorpay (India)
Razorpay uses a two-step checkout model. You create an order on Razorpay’s servers via their API, which returns an order_id. The customer then completes payment on Razorpay’s checkout.js widget (loaded in your site), and Razorpay returns a payment_id, order_id, and signature to your frontend. You verify this signature server-side and mark the order complete.
| Feature | Details |
|---|---|
| Supported methods | Cards, UPI, netbanking, wallets, EMI, BNPL |
| API type | REST + checkout.js widget |
| Webhook support | Yes – payment.captured, payment.failed events |
| Test credentials | Test mode with test card numbers (no real charges) |
| PCI scope | Reduced – card data never touches your server |
| INR support | Yes – primary currency |
The Razorpay PHP SDK handles order creation and signature verification. Install via Composer: composer require razorpay/razorpay. The official Razorpay WooCommerce plugin is open-source on GitHub and is worth reading as a reference implementation before building a custom one.
Mollie (Europe)
Mollie is a payment service provider that aggregates European payment methods under a single API: iDEAL, Bancontact, SOFORT, SEPA Direct Debit, Klarna, credit cards, and more. One API call creates a payment, Mollie handles the method-specific flow, and a webhook notifies you when payment status changes.
| Feature | Details |
|---|---|
| Supported methods | iDEAL, SEPA, Bancontact, Klarna, credit cards, 30+ methods |
| API type | REST with server-side redirect |
| Webhook support | Yes – status updates via POST to your webhook URL |
| Multi-currency | Yes – EUR, GBP, USD, and more |
| Recurring payments | Yes – mandates for subscriptions |
| Test mode | Full sandbox environment with test payment IDs |
Mollie’s PHP client library is the cleanest of the three: composer require mollie/mollie-api-php. The API is well-documented and the test mode makes integration straightforward. Their official WooCommerce plugin is also open-source and covers recurring payments via WooCommerce Subscriptions.
Paytm (India)
Paytm operates differently from Razorpay – it uses a transaction token approach where you generate a txn_token server-side, pass it to the Paytm checkout form, and verify the transaction via a status API call after redirect. Paytm’s API is less developer-friendly than Razorpay’s but has significant market share particularly in Tier 2 and Tier 3 cities in India.
| Feature | Details |
|---|---|
| Supported methods | Paytm wallet, UPI, cards, netbanking, EMI |
| API type | REST + hosted page redirect |
| Webhook support | Limited – primarily redirect-based confirmation |
| Test mode | Staging environment (separate credentials) |
| Checksum | SHA256 HMAC required on all API calls |
PCI DSS Compliance for Custom Payment Gateways
PCI DSS (Payment Card Industry Data Security Standard) compliance is a legal requirement for any business that processes, stores, or transmits cardholder data. The scope of your compliance obligations depends heavily on how you implement your payment gateway.
SAQ Levels and Gateway Architecture
The key principle for keeping your PCI scope minimal is to ensure card data never passes through your server. Using hosted payment forms (Razorpay checkout.js, Mollie hosted pages, Stripe.js) means you qualify for SAQ A or SAQ A-EP, the lowest compliance tiers. Building a direct card capture form where card numbers POST to your server places you in SAQ D, which requires an annual QSA audit.
| Architecture | SAQ Level | Annual Requirements | Compliance Effort |
|---|---|---|---|
| Redirect to hosted payment page | SAQ A | Self-assessment questionnaire | Low |
| iFrame from payment provider | SAQ A-EP | Self-assessment + ASV scan | Low-Medium |
| JS tokenization (Stripe.js, Razorpay.js) | SAQ A-EP | Self-assessment + ASV scan | Low-Medium |
| Direct card form (card data POSTs to your server) | SAQ D | Annual QSA audit required | Very High |
For virtually all custom WooCommerce gateway implementations, the correct approach is to use the payment provider’s JavaScript SDK for tokenization. Card numbers are tokenized in the browser by the provider’s JS, and only the token passes through your server. This is how Razorpay checkout.js, Stripe.js, and Mollie’s components all work.
HTTPS and Security Requirements
WooCommerce will warn and refuse to display payment gateways on pages that are not served over HTTPS. This is a hard requirement. In addition to TLS, your checkout pages should have:
- Content Security Policy headers that allowlist only payment provider scripts
- Subresource Integrity (SRI) checks on payment provider SDK scripts where supported
- HSTS headers to prevent protocol downgrade attacks
- No mixed content (HTTP assets on HTTPS pages)
Admin Settings and Gateway Configuration
WooCommerce provides a complete admin settings UI for free through the init_form_fields() method. Define your settings fields as an array and WooCommerce renders, saves, and loads them automatically. Every gateway needs at minimum:
- Enable/disable toggle
- Title (shown to customer at checkout)
- Description (shown to customer at checkout)
- API key / merchant ID fields (at least two: test + live)
- Test mode toggle
- Webhook secret field
Access saved settings in your class with $this->get_option('field_id'). The init_settings() call in your constructor loads all settings from the database, and WooCommerce handles the save form automatically. You never need to write your own settings save logic.
Testing Your Payment Gateway
Testing a payment gateway is more involved than testing standard WordPress code because it involves live external API calls, webhook delivery, and multi-step flows. Follow this checklist before deploying to production.
Unit Testing Gateway Logic
Test your gateway’s business logic independently of the payment provider using mock API responses. The WooCommerce test framework extends PHPUnit and provides WC_Helper_Order and related utilities for creating test orders in memory:
End-to-End Testing Checklist
| Test Case | Expected Behaviour | Pass? |
|---|---|---|
| Gateway appears on checkout | Listed when enabled, hidden when disabled | |
| Test mode successful payment | Order status: Processing, stock reduced | |
| Test mode failed payment | Order stays pending, error notice shown | |
| Webhook payment.captured fires | Order status updated to Processing | |
| Webhook signature verification fails | Request rejected with 400, no order update | |
| Duplicate webhook delivery | Idempotent – second call does not double-process | |
| Customer cancels payment | Order cancelled, cart restored | |
| Partial refund via admin | Refund created at payment provider, order note added | |
| Full refund via admin | Full refund processed, order status: Refunded | |
| Gateway with no API key configured | Gateway hidden from checkout (not just erroring) |
Testing Webhooks Locally
Payment provider webhooks require a publicly accessible URL, which your local development environment does not have. Use ngrok or Cloudflare Tunnel to expose your local site temporarily for webhook testing. Run ngrok http 80, register the generated HTTPS URL as your webhook endpoint in the payment provider dashboard, and trigger a test payment. You can then observe webhook delivery in the ngrok dashboard and your WordPress debug log simultaneously.
For Razorpay specifically, their dashboard includes a webhook test feature that lets you replay any webhook event with a custom payload, which is useful for testing edge cases like failed payments and chargebacks without completing real transactions.
Adding Refund Support
WooCommerce’s admin refund interface works with your gateway if you implement can_refund_order() and process_refund(). Without these, store managers must manually initiate refunds from the payment provider’s dashboard and then mark the order as refunded in WooCommerce – a process that is error-prone and slow.
The process_refund() method returns true on success or a WP_Error on failure. WooCommerce displays the error message in the admin if the refund fails. Always add an order note documenting the refund attempt and its result – this creates an audit trail for dispute resolution and customer service queries.
Idempotency – Handling Duplicate Webhooks
Payment providers sometimes deliver the same webhook multiple times – due to network timeouts, retry policies, or provider-side infrastructure issues. Your webhook handler must be idempotent: processing the same event twice must produce the same outcome as processing it once.
The standard approach is to check the current order status before processing:
- If the order is already in “processing” or “completed” status and you receive a “payment.captured” webhook, skip the update and return 200 to acknowledge receipt
- Store the payment ID as order meta on first processing and skip duplicate payment IDs
- Never call
$order->payment_complete()more than once on the same order
WooCommerce’s order status transitions are not atomic at the database level, so if two webhooks arrive simultaneously (rare but possible in high-traffic stores), use a transient-based lock on the order ID before processing:
Common Integration Mistakes to Avoid
After reviewing dozens of custom WooCommerce gateway implementations, these are the mistakes that appear most frequently and cause the most serious production issues.
- Not verifying webhook signatures. Skipping signature verification opens your store to fraudulent order completion. An attacker who knows your webhook URL can send a fake “payment.captured” event and receive goods without paying. Always verify signatures before touching order data.
- Using order notes as the source of truth for payment status. Always store the payment provider’s transaction ID as post meta (
_transaction_id), not just in order notes. Use it for idempotency checks and to look up transactions in the provider’s API when debugging. - Not handling the case where the customer abandons the redirect. If a customer starts payment but never returns from the redirect, the order stays in “pending payment” indefinitely. Set up a WP-Cron job to check the status of pending payment orders older than 30 minutes via the provider’s API.
- Logging full API responses to the debug log in production. Payment API responses contain sensitive data. Use WooCommerce’s
wc_get_logger()with a dedicated log context, and only log what you need for debugging (status codes and error codes, not full response bodies). - Not testing the WooCommerce Blocks checkout. If your store uses WooCommerce Checkout Block (not the classic shortcode), your gateway needs to register Block compatibility. Without it, the gateway may not appear in the Blocks checkout experience.
Making Your Gateway Compatible with WooCommerce Blocks
WooCommerce is actively migrating toward Block-based checkout. If you are also building custom endpoints to expose payment data to headless frontends, our WooCommerce Store API developer guide covers the authentication patterns you will need. If your store uses [woocommerce_checkout] (classic shortcode), your existing gateway works as-is. But if you are on the Checkout Block, gateways must explicitly declare Block compatibility using the IntegrationInterface.
Block-compatible payment gateways register a JavaScript payment method using @woocommerce/blocks-registry. The JavaScript component handles rendering the payment UI within the Checkout Block. This is a React component, which means Block-compatible gateways require both PHP (server-side) and JavaScript (client-side) development. Major payment providers (Stripe, PayPal, Mollie) have already updated their official WooCommerce plugins for Block compatibility – if you are building a custom integration, their open-source implementations serve as excellent reference code.
Frequently Asked Questions
Can I use the same gateway class for multiple currencies?
Yes. Use the get_supported_currencies() method to return an array of ISO currency codes your gateway supports, and check against get_woocommerce_currency() in your constructor to hide the gateway when the store is configured for an unsupported currency. For multi-currency stores using WPML or Aelia Currency Switcher, you may need to convert the order amount to the base currency before calling the payment API, then convert back for display.
How do I handle currency conversion for regional gateways?
Regional gateways like Razorpay and Paytm only accept INR. If your WooCommerce store displays prices in USD or EUR but your gateway only processes INR, you have two options: configure WooCommerce to use INR as the base currency (with a currency switcher plugin handling display conversion), or perform the currency conversion in your process_payment() method using a live exchange rate API before calling the payment provider. The second approach is more complex and introduces exchange rate risk – most stores serving India choose INR as the base currency.
Should I use an existing plugin as a starting point?
For Razorpay, Mollie, and Paytm specifically, the official vendor-maintained plugins are available on GitHub and WordPress.org. Before building from scratch, check whether the official plugin meets your needs. Custom development makes sense when you need deep customization (custom checkout fields, specific business logic, integration with your ERP or loyalty system), or when the official plugin lacks features your store requires. Reading the official plugin source code is always worthwhile even if you build your own – it reveals edge cases and API quirks that documentation misses.
Getting Your Custom Gateway to Production
Before switching a custom payment gateway from test mode to live mode on a production store, complete this pre-launch checklist:
- Complete all 10 test cases in the testing checklist above on a staging environment with real test credentials
- Verify webhook delivery using the payment provider’s webhook testing tools – confirm your endpoint returns 200 and processes correctly
- Test on both classic checkout and Checkout Block if your store uses Blocks
- Confirm refund flow end-to-end: initiate from WooCommerce admin, verify refund appears in payment provider dashboard
- Review PCI scope with your payment provider and confirm your implementation qualifies for SAQ A or SAQ A-EP
- Enable WooCommerce gateway logging for the first week of production and monitor for errors
- Set up payment failure alerting – a spike in failures at go-live usually indicates an API configuration issue (wrong live vs test keys, IP allowlisting, etc.)
Regional payment methods are worth the development investment when your customer base expects them. A store selling to Indian customers that offers only PayPal will see significantly higher cart abandonment than one that offers UPI and netbanking. The WC_Payment_Gateway API is stable, well-documented, and designed to accommodate exactly this kind of regional customization – the investment in building it correctly pays back immediately in conversion rates.
For the next step after building your gateway, see our guide to migrating from classic checkout to WooCommerce Checkout Blocks – it covers the Block compatibility requirements your gateway will need to meet as the platform continues its migration to Block-based checkout.